Painting St Polycarp (Part 1): Garments
This is my second attempt at writing this blog tutorial. I had finished writing it in a state of utter exhaustion and was just about to press save and publish when the browser crashed and I lost everything…so here we go again…
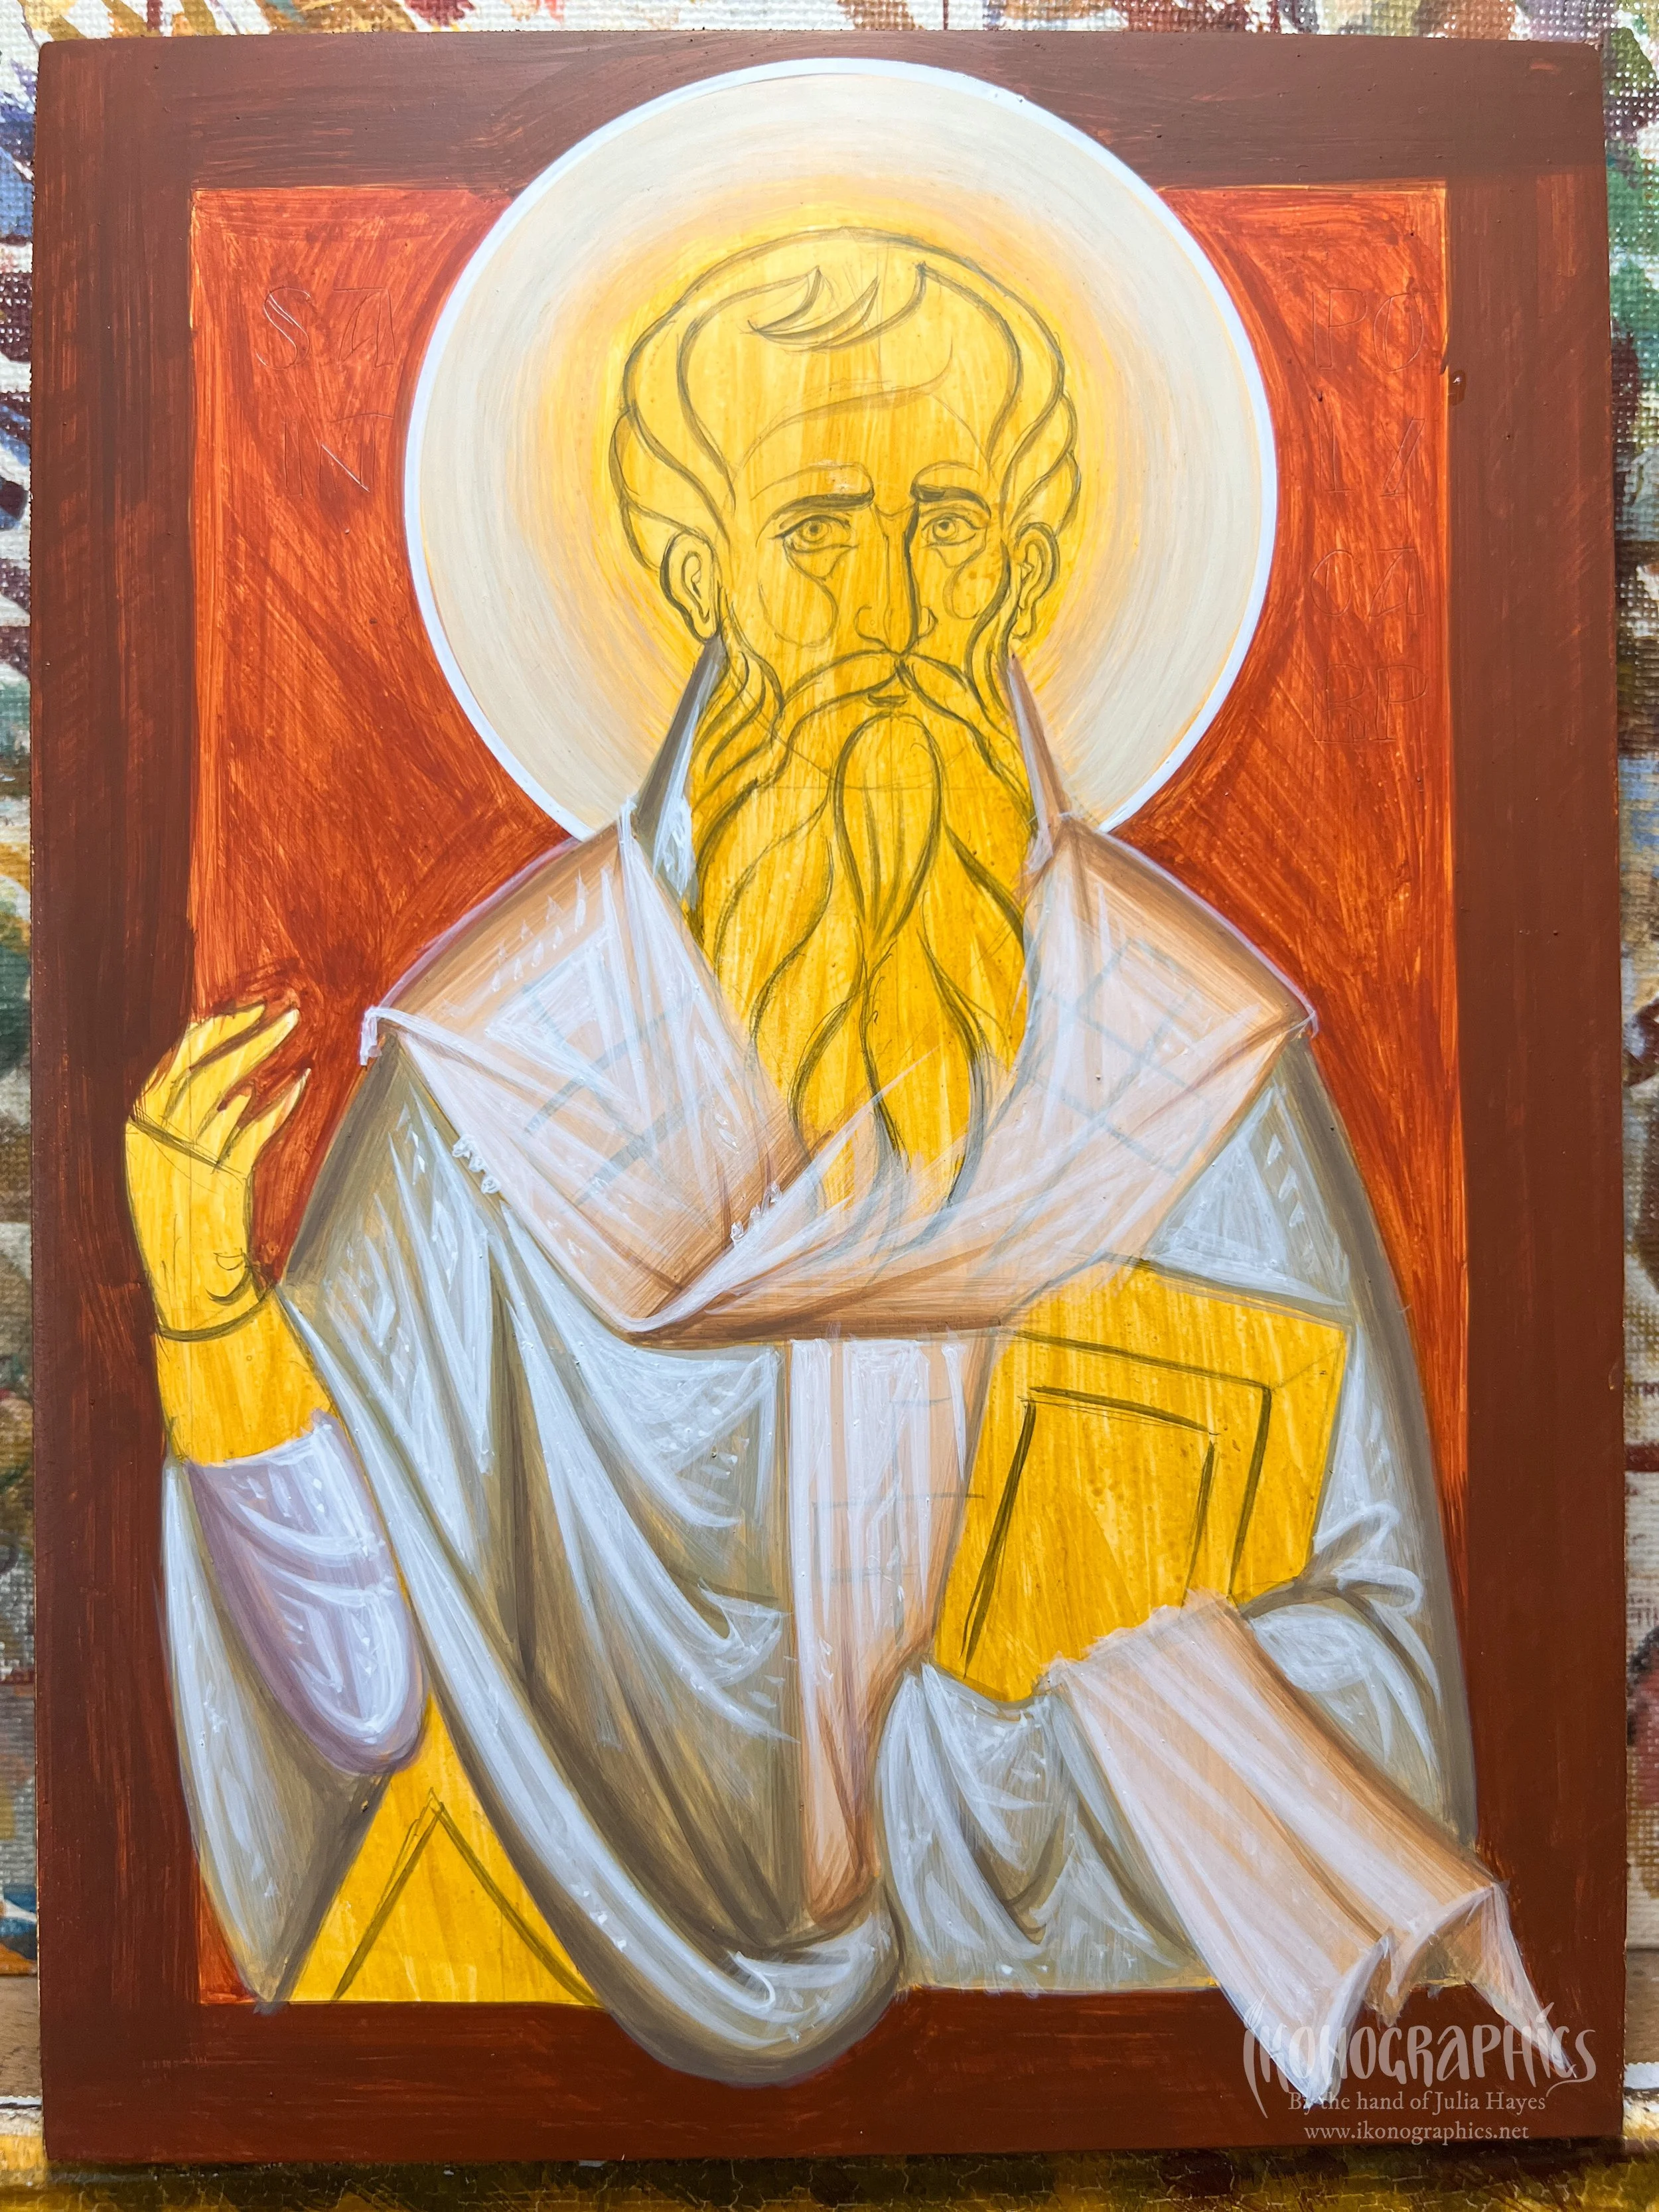
In this blog tutorial I will be taking you step by step through painting the icon os St Polycarp which I painted as part of a set of three icons including St Timothy and St Irenaeus. There are real time bonus videos available of the whole process on Patreon from the €5 tier and above. You can now also access exclusive content when you sign up as a free member.

Sketch
After making some rough preparatory sketches I draw the final sketch onto the panel lightly in pencil.
The sketch video is available on Patreon here.

Background and Halo
The whole panel is first prepared with egg emulsion diluted with water (approx 1:2) to seal the surface. Then a layer of yellow ochre is painted over the surface creating a unifying warm layer.
The background is light mars red and the border, light mars red and black.
The halo starts off with a layer of yellow ochre. The next layer is white, yellow ochre and a tiny touch of black (to cool the colour). This is blended into the yellow ochre. For the next layers more white is added, and a pure white circle is painted with a compass. For a detailed step-by-step explanation see this post available to free members on Patreon.

Proplasmoi
Because I’m painting three light garments, I’m painting the phelonion with a cooler green prolpasmos (white, yellow ochre and black) and the omophorion with a warmer peachy one (white, yellow ochre and light mars red. The sleeve of the sticharion is also a cool blue (white+black). While the phelonion is cool in relation to the omophorion, it is warm in relation to the sticharion. You can learn more about bow colour functions in the icon and the importance of the counterpoint of warm and cool in my tutorial on the Function of Colour and Light in the Icon.

Phelonion : 1st Grapsimo
For the 1st grapsimo we add a little light mars red and black to the proplasmos to create a warmer tone. We go over the sketch in the darker areas and blend into the proplasmos.

Phelonion: 2nd Grapsimo
For the 2nd grapsimo we add a little more red and black to the first and build it up in the darker areas within the first.

Omophorion: 1st Grapsimo
For the 1st grapsimo with take a little proplasmos and again little mars red and black. We paint the sketch (except for in the lightest areas) and blend into the proplasmos.

Omophorion: 2nd Grapsimo
For the 2nd grapsimo we add a little more red and black to the 1st. Again build this up in the darker areas within the 1st grapsimo.
The video about painting the proplasmoi and grapsimata is available here.

Omophorion: 1st Photisma
The photismata for all these garments will be painted in the same way.
The 1st photisma is pure titanium white that that is fairly transparent. With this we build up the main forms.
Sticharion: Grapsimata
1st: Add a little medium mars red and black to the proplasmos.
2nd: Add a little medium mars red and black to the 1st grapsimo.

Omophorion: Glaze
We dilute the white to create a glaze with which we unify the forms without losing them.

Omophorion: 2nd Photisma
For the 2nd photisma we add more pigment so that it is a thicker consistency and build up the forms within the 1st photisma, only on the lighter/broader side of the garment, so that it projects more towards the viewer.

Phelonion: 1st Photisma
Again we use semi-transparent white to create the forms.

Phelonion: Glaze
Unify the forms with the glaze.
Phelonion: 2nd Photisma
Add more pigment so that it is a thicker consistency and build up the forms within the 1st photisma, only on the lighter/broader side of the garment.
The real time bonus video of the photismata is available here.

Omophorion: Crosses
I usually wait for a day for the paint to dry well before painting the crosses, so that the paintbrush doesn’t pick up the previous layers. For the crosses I mix black with a tiny bit of white. Then for the darker areas I add more black. The highlights are painted with diluted white.
The real time bonus video of painting the crosses is available here.
If you enjoy my content consider buying me a cup of Kofi: https://ko-fi.com/ikonographics