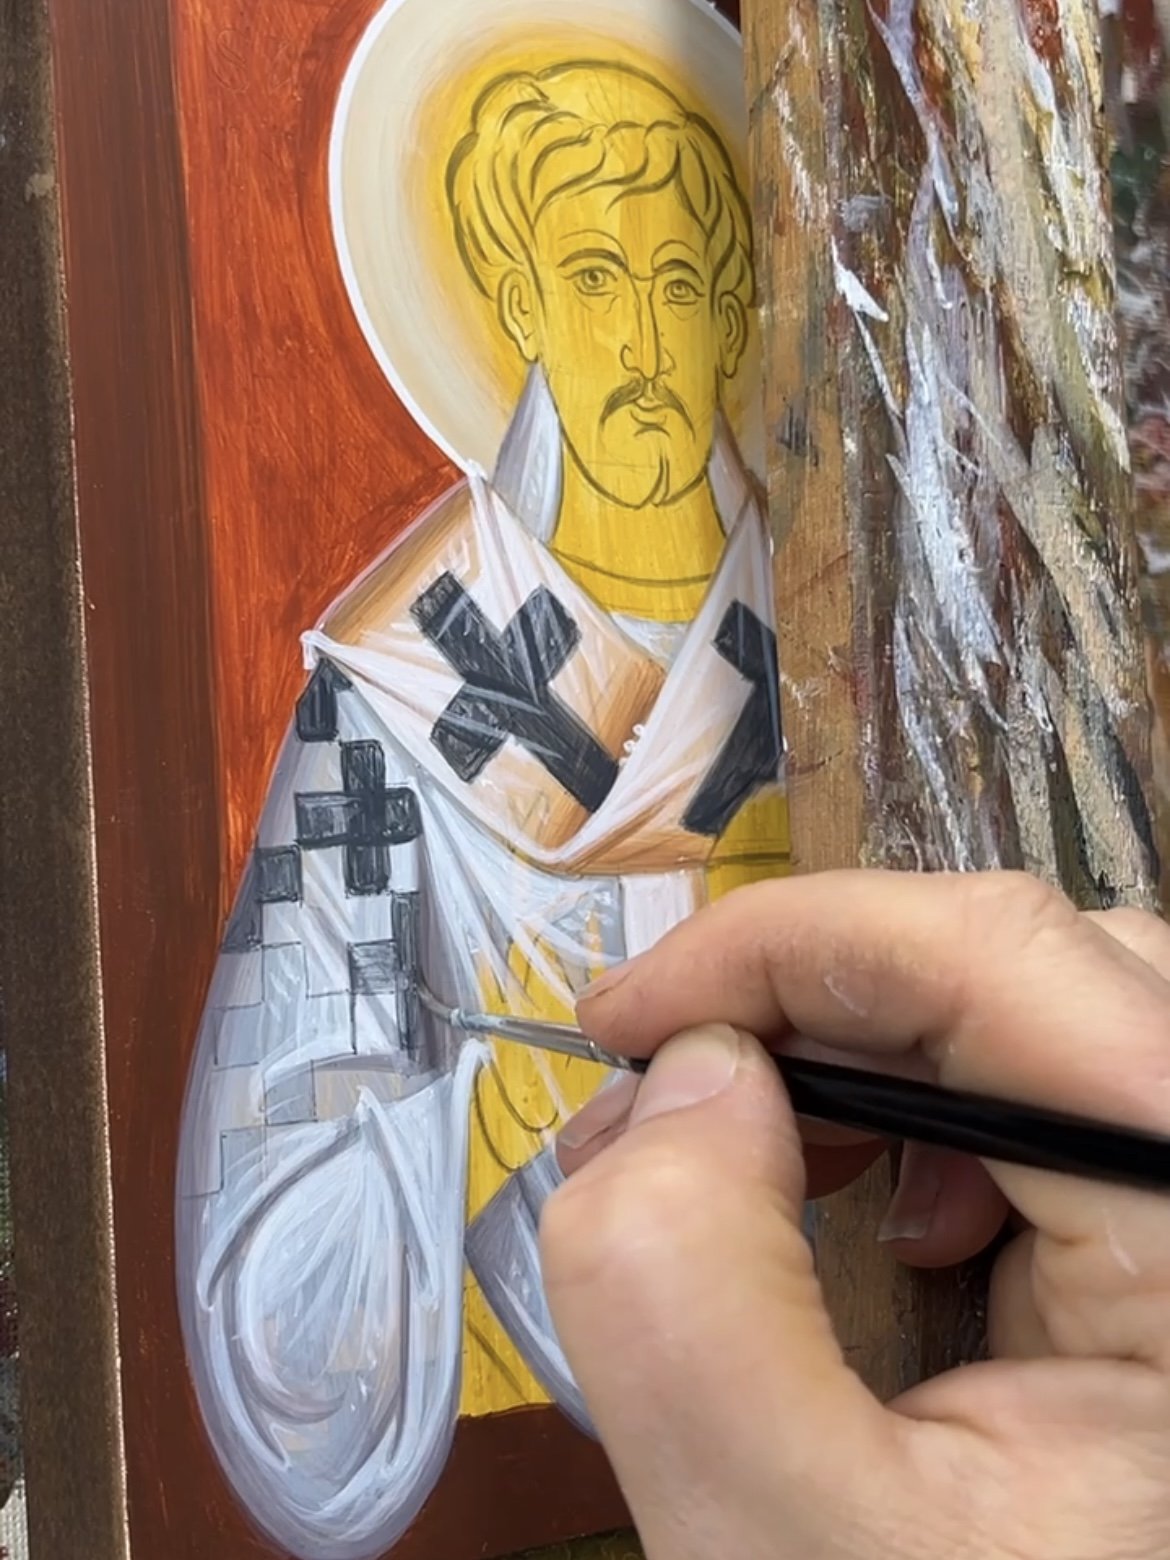
Painting St Timothy’s Garments (Polystavrion)
This icon of St Timothy was painted as part of a set along with St Polycarp and St Irenaeus. In this blog tutorial I will be concentrating on painting his phelonion with the polystavrion. The process of painting the background, halo as well as the omophorion are the same as that of St Polycarp which you will find in this tutorial here. There is real time bonus video on Patreon of the process of painting this polystavrion that can be used in conjunction with this blog tutorial here.

Garment Sketch
Here you can see the painted sketch where I have also lightly painted in the crosses of the polystavrion. You can also lightly engrave the pattern with a compass point.

Proplasmos
The proplasmos for the phelonion is a mix of titanium white and iron oxide black to create a light blue as the base for this white garment.

1st Grapsimo
For the 1st grapsimo we add a touch of black and a touch of medium mars red to create a warmer lilac colour and we paint in the darker parts of the sketch and blend into the proplasmos with a flattened brush.

2nd Grapsimo
We add a touch more black and medium mars red to the 1st grapsimo and again build up the darker areas within the 1st grapsimo.

1st Photisma
For the 1st photisma we use semi-transparent titanium white to create the forms.

Glaze
We further dilute the 1st photisma to make a glaze to unify the forms and transition into the proplasmos, without losing the forms

2nd Photisma
For the 2nd photisma we add more titanium white pigment to the first so that it is more opaque and we paint the 2nd photisma within the 1st only on the broader/ lighter side of the figure.

Crosses Outline
The colour for the crosses is made with black and a touch of white and I first outline the pattern. The colour isn’t completely opaque so that we can build up the grapsimata and so that it doesn’t look completely flat.
Crosses Fill In
After outlining we fill in the crosses.

Grapsimata
Now with pure black we build up the grapsimata and blend into the darker areas where necessary.

Photisma
Finally we go over the areas of the final photisma.